Anúncios
Crochet is more than just a craft—it’s a timeless art form that transforms simple yarn into stunning handmade treasures you’ll cherish forever.
Anúncios
Whether you’re a complete beginner or someone who has dabbled in yarn crafts before, learning crochet opens up a world of creative possibilities.


From cozy blankets and stylish garments to delicate home décor and adorable amigurumi, the versatility of crochet knows no bounds.
Anúncios
This comprehensive guide will walk you through everything you need to know to create beautiful crochet pieces. We’ll cover essential techniques, helpful tips, and inspiring project ideas that will transform you from a curious beginner into a confident crocheter.
Let’s embark on this colorful journey together! 🧶
Understanding the Basics: Your Foundation for Success
Before diving into complex patterns, it’s crucial to understand the fundamental elements that make crochet work. Unlike knitting, which uses two needles, crochet relies on a single hook to create loops and stitches. This simplicity makes it surprisingly accessible for beginners.
The beauty of crochet lies in its straightforward approach. Each stitch builds upon the previous one, creating a fabric that’s often more forgiving than other textile crafts. If you make a mistake, you can easily unravel your work back to the error without losing all your progress.
Essential Tools Every Crocheter Needs ✨
Starting your crochet journey doesn’t require a massive investment. A few basic supplies will set you up for success:
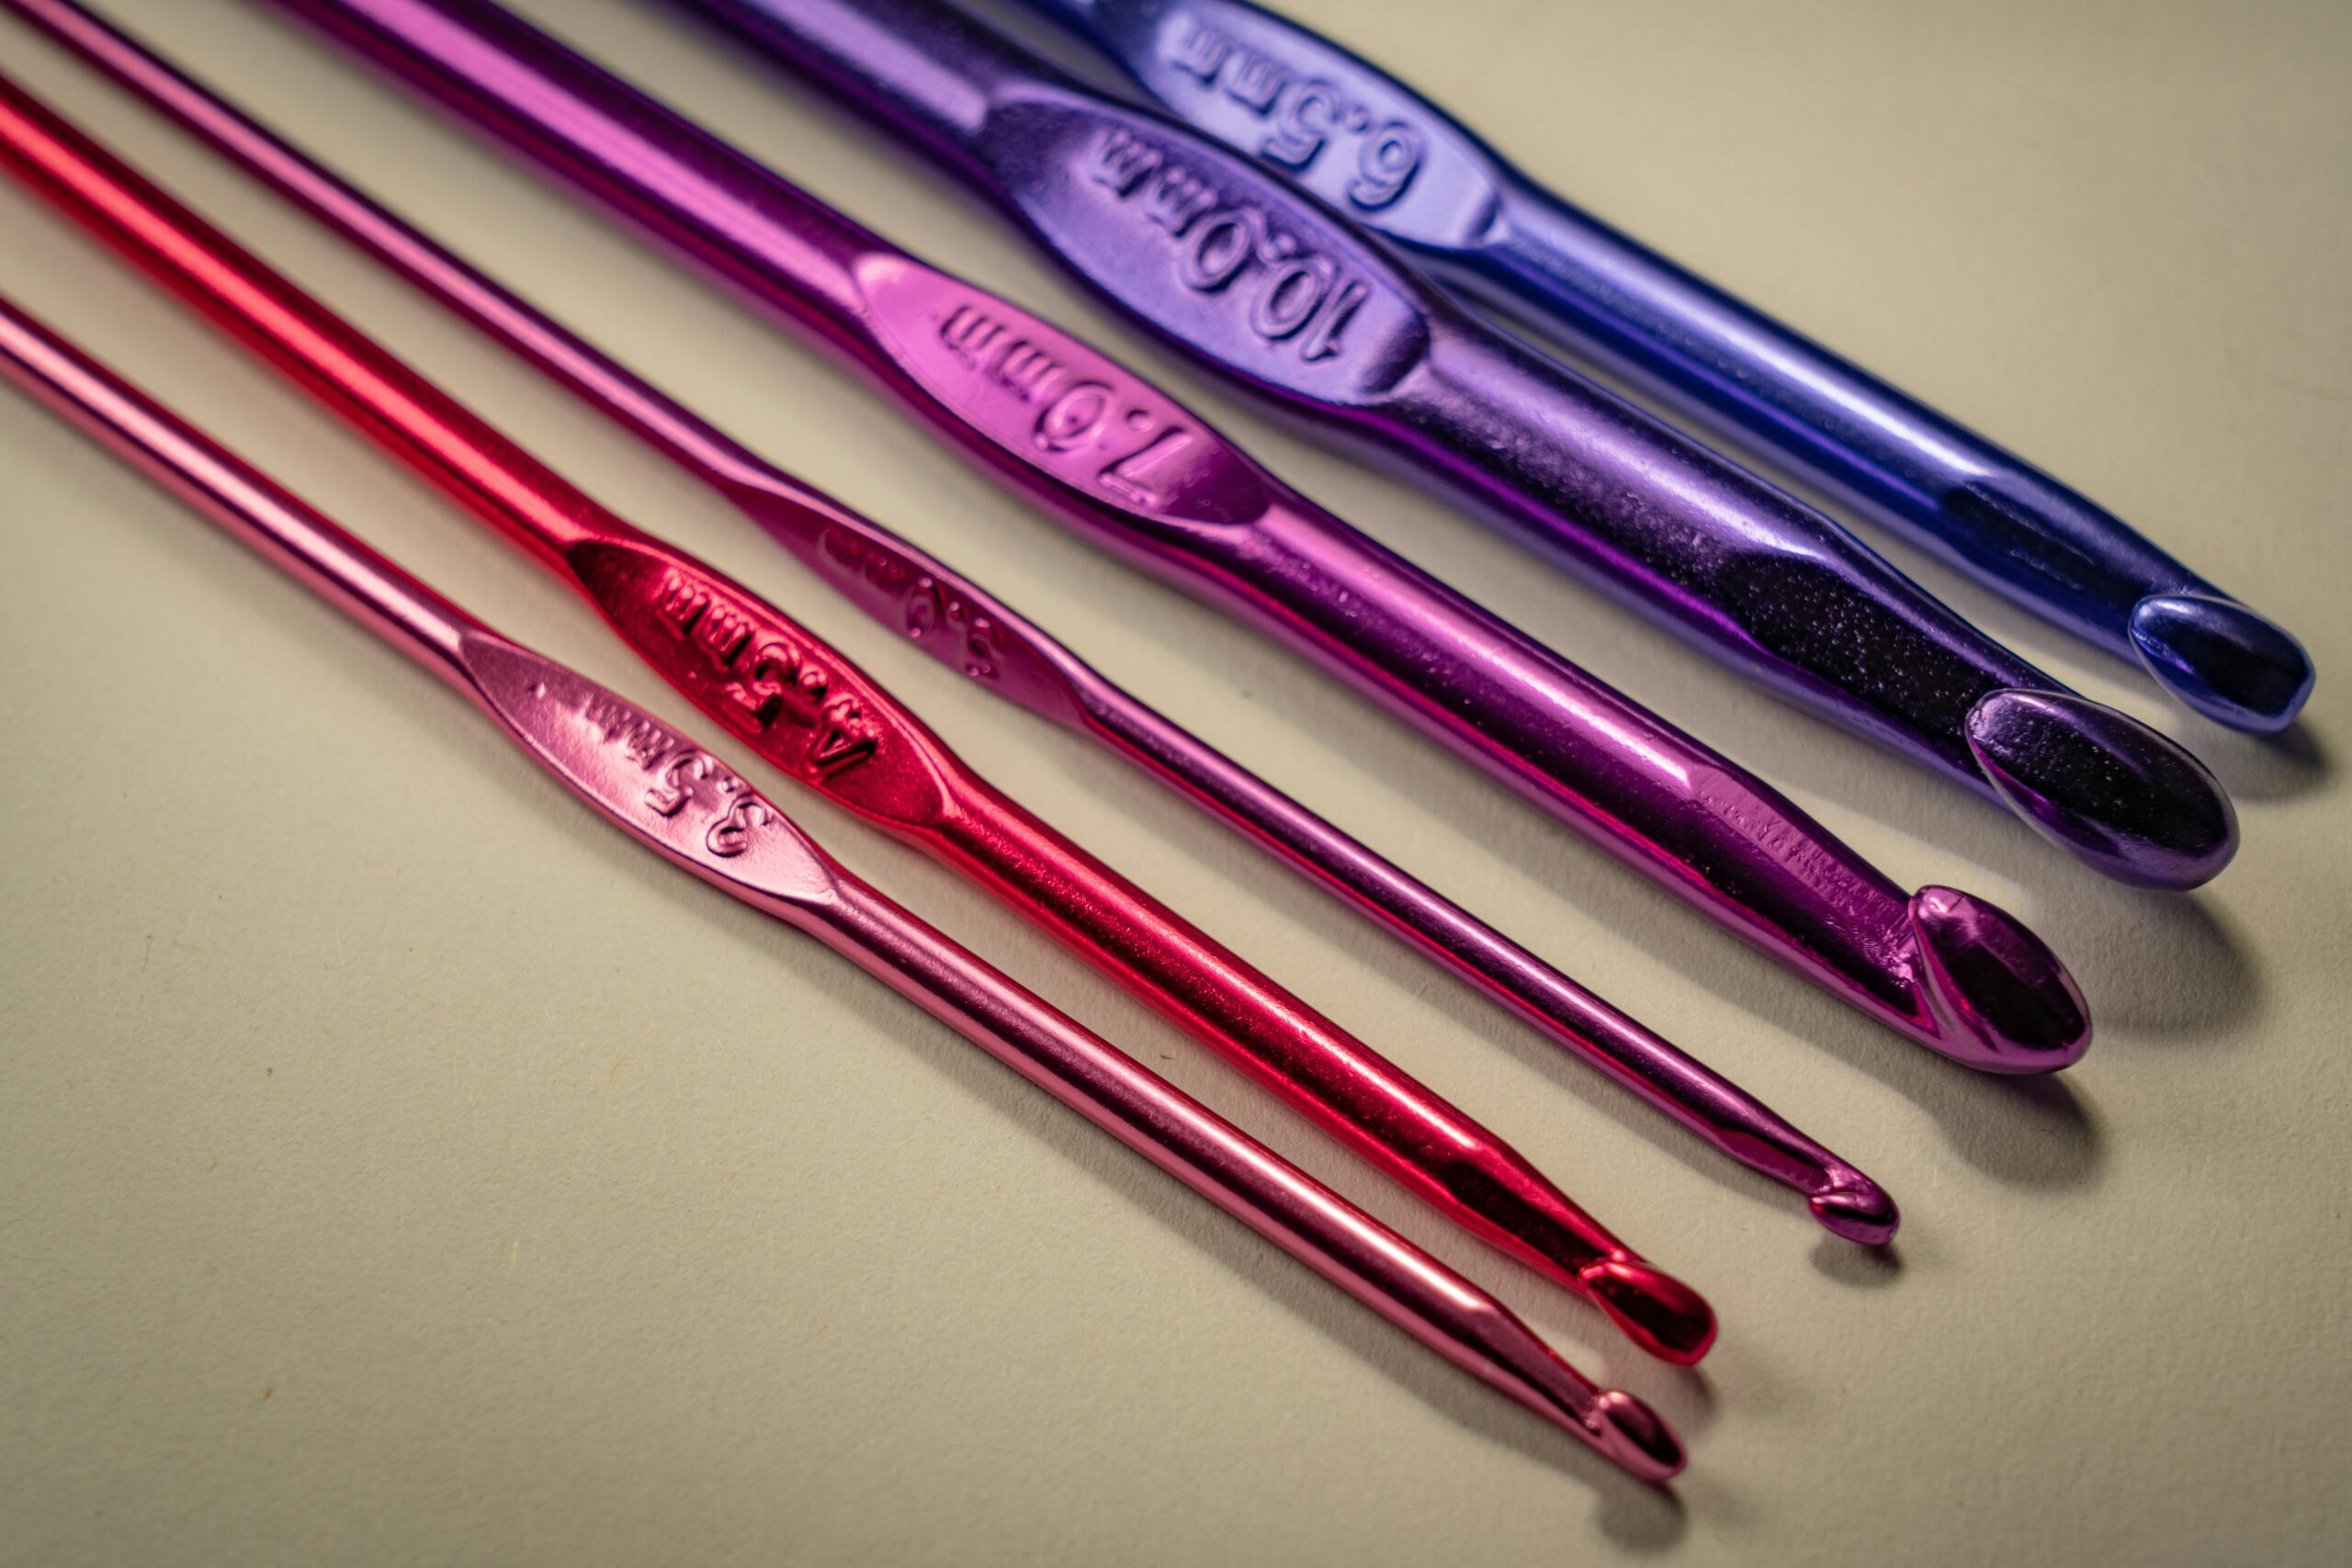
- Crochet hooks: Begin with a medium-sized hook (5mm or H/8) in aluminum or bamboo for comfortable handling
- Yarn: Choose worsted weight acrylic yarn in light colors—it’s affordable, durable, and makes stitches easier to see
- Scissors: Sharp fabric scissors for clean cuts
- Tapestry needle: For weaving in ends and sewing pieces together
- Stitch markers: Helpful for keeping track of your place in patterns
- Measuring tape: Essential for ensuring proper sizing
As you progress, you’ll likely expand your collection with different hook sizes, specialty yarns, and organizational tools. But these basics will carry you through your first several projects beautifully.
Mastering the Foundation Chain: Where Every Project Begins
The foundation chain is the starting point for almost every crochet project. Think of it as the base upon which you’ll build your masterpiece. Learning to create an even, consistent chain is one of the most important skills you’ll develop.
To create a foundation chain, start with a slip knot on your hook. Yarn over (wrap the yarn around your hook) and pull through the loop. Repeat this process, and you’ll see a series of connected loops forming a chain. Practice maintaining consistent tension—not too tight that your hook struggles to enter the stitches, and not too loose that your work looks sloppy.
The Magic of Basic Stitches 🪡
Once you’ve mastered the chain, you’re ready to learn the fundamental stitches that form the backbone of crochet work:
Slip Stitch (sl st): The shortest stitch, primarily used for joining rounds or moving across stitches without adding height. Insert your hook, yarn over, and pull through both loops on your hook in one motion.
Single Crochet (sc): Creates a tight, dense fabric perfect for amigurumi and structured items. Insert hook, yarn over and pull through (two loops on hook), yarn over and pull through both loops.
Half Double Crochet (hdc): A versatile medium-height stitch. Yarn over before inserting hook, pull up a loop (three loops on hook), yarn over and pull through all three loops.
Double Crochet (dc): Creates an airy, flexible fabric ideal for blankets and garments. Yarn over, insert hook, pull up loop, yarn over and pull through two loops, yarn over and pull through remaining two loops.
Practice each stitch repeatedly until your hands develop muscle memory. Create sample swatches to compare how different stitches look and feel.

Reading Patterns: Decoding the Crochet Language
Crochet patterns might look intimidating at first glance, filled with abbreviations and numbers that seem like a secret code. But once you understand the language, patterns become your roadmap to creating incredible pieces.
Most patterns include several key components: materials list, gauge information, finished measurements, abbreviations key, and step-by-step instructions. Take time to read through the entire pattern before starting. This preview helps you understand the construction method and anticipate any tricky sections.
Common Pattern Abbreviations Demystified 📖
Familiarizing yourself with standard abbreviations makes pattern-reading significantly easier. While specific patterns may include unique terms, these form the foundation:
- ch – chain
- sc – single crochet
- dc – double crochet
- hdc – half double crochet
- tr – treble crochet
- st(s) – stitch(es)
- rep – repeat
- inc – increase
- dec – decrease
- rnd – round
- RS/WS – right side/wrong side
Patterns also use brackets, parentheses, and asterisks to indicate repetitions. For example: “*dc in next 3 sts, inc in next st*, rep from * to * 4 times” means you’ll perform that sequence four times total.
Tension and Gauge: The Secret to Perfect Sizing
One of the most overlooked aspects of crochet is maintaining proper tension and checking gauge. Your tension—how tightly or loosely you hold the yarn—directly impacts the size and drape of your finished piece.
Gauge refers to the number of stitches and rows per inch in your work. Every pattern specifies a gauge, and matching it ensures your project turns out the intended size. A sweater that should fit a medium might end up extra-large if your stitches are too loose, or child-sized if too tight.
Creating and Measuring Gauge Swatches 📏
Before starting any sized project, create a gauge swatch using the specified yarn and hook size. Make a square at least 4×4 inches using the pattern’s main stitch. Lay it flat without stretching, and count how many stitches and rows fit within a 4-inch section.
If you have too many stitches per inch, your work is too tight—try a larger hook. If you have too few, your work is too loose—size down your hook. This simple step saves countless hours of frustration from having to restart projects that don’t fit properly.
Beginner-Friendly Projects That Build Confidence 🌟
Starting with manageable projects keeps you motivated and helps you practice essential skills without feeling overwhelmed. Choose projects that genuinely excite you—you’ll be more likely to finish them!
Dishcloths and Washcloths: Perfect first projects that work up quickly and allow you to practice basic stitches. They’re practical, forgiving of minor mistakes, and use minimal yarn. Experiment with different stitch patterns to create interesting textures.
Scarves: Long, rectangular projects that let you practice maintaining consistent tension over many rows. Choose a simple stitch pattern and soft yarn for a wearable result you’ll actually use.
Granny Squares: These classic motifs teach you to work in rounds, change colors, and join pieces together. Make several squares and connect them into blankets, bags, or cushion covers.
Simple Hats: Once you’re comfortable with basic stitches, hats introduce working in the round and basic shaping through increases and decreases.
Color Work and Yarn Selection Strategies
Choosing the right yarn transforms your project from ordinary to extraordinary. Yarn comes in countless fibers, weights, and colors, each bringing unique characteristics to your work.
Natural fibers like cotton, wool, and bamboo offer breathability and beautiful drape, while acrylic provides affordability and easy care. Blends combine the best properties of multiple fibers. Consider your project’s purpose when selecting yarn—baby items need soft, washable yarn, while decorative pieces can use more delicate fibers.
Creating Stunning Color Combinations 🎨
Color choices dramatically impact your project’s appearance. Don’t be afraid to experiment, but keep these principles in mind:
- Analogous colors (neighbors on the color wheel) create harmonious, soothing combinations
- Complementary colors (opposites on the color wheel) produce vibrant, energetic contrasts
- Monochromatic schemes using different shades of one color feel sophisticated and cohesive
- Neutral bases with pops of bright color add interest without overwhelming
When working with multiple colors, carry unused yarn along the side of your work rather than cutting and weaving in ends constantly. This technique saves time and creates neater edges.
Advanced Techniques That Elevate Your Work
As your skills develop, incorporating advanced techniques adds professional polish to your pieces. These methods might seem complex initially, but they become second nature with practice.
Invisible Joins: Instead of obvious seams, invisible joins create seamless connections between rounds. This technique is essential for amigurumi and any project where you want a polished finish.
Surface Crochet: Add decorative elements to finished pieces by working stitches on top of the fabric. This technique creates beautiful embellishments without bulk on the wrong side.
Tapestry Crochet: Carry multiple yarn colors throughout your work to create intricate colorwork patterns and images. The unused colors hide inside your stitches, creating a neat reverse side.
Tunisian Crochet: This hybrid technique uses a long hook and combines elements of knitting and crochet for unique textured fabrics with minimal curling.
Troubleshooting Common Challenges 🔧
Every crocheter encounters obstacles along their creative journey. Recognizing common problems and their solutions prevents frustration and keeps your projects moving forward.
Edges that slant or wave: This usually indicates inconsistent stitch counts. Count your stitches at the end of each row to catch mistakes early. Use stitch markers at row beginnings to avoid accidentally skipping or adding stitches.
Work that curls excessively: Some stitches naturally curl more than others. Blocking (wetting or steaming finished pieces into shape) often resolves this issue. For persistent curling, try a different stitch pattern or add a border in a non-curling stitch.
Holes or gaps in your work: Check that you’re inserting your hook in the correct location for each stitch. Gaps often appear when you accidentally skip stitches or work into spaces rather than stitches.
Yarn that splits constantly: Some yarns are more prone to splitting. Using a hook with a rounded tip rather than a sharp point helps. You can also try slightly loosening your tension or choosing a smoother yarn.
Finishing Techniques for Professional Results
How you finish your project matters just as much as the stitching itself. Professional finishing transforms homemade items into heirloom-quality pieces.
Weaving in ends properly: Never leave ends shorter than 6 inches. Thread them onto a tapestry needle and weave through several stitches in one direction, then back in the opposite direction for security. For extra strength on items that will be washed frequently, weave ends through stitches of the same color.
Blocking your work: This process shapes your finished piece to the correct dimensions and evens out stitches. Wet blocking involves soaking your item, gently squeezing out water, and pinning it to measurements while drying. Steam blocking uses an iron’s steam (never touching the fabric directly) to set the stitches.
Adding borders: A well-chosen border frames your work beautifully and can correct minor shaping issues. Simple single crochet borders add clean edges, while more decorative borders with shells or picots create visual interest.
Building Your Crochet Library and Resources 📚
Continuous learning keeps your crochet journey exciting and expands your creative possibilities. Building a collection of trusted resources ensures you always have inspiration and guidance at hand.
Invest in a few comprehensive reference books covering basic techniques, stitch dictionaries, and pattern collections. Online resources like video tutorials are invaluable for visual learners—seeing how stitches are formed helps tremendously when written instructions feel confusing.
Join crochet communities online or in person. Fellow crocheters offer support, troubleshooting help, and inspiration. Many cities have crochet groups that meet at libraries or yarn shops, providing wonderful opportunities to learn from experienced makers.
Developing Your Personal Crochet Style 💫
As you gain experience, you’ll naturally develop preferences for certain yarns, colors, and project types. Embrace this evolution—your unique style is what makes your creations special.
Don’t feel obligated to follow patterns exactly. Once you understand the basic construction, feel free to modify colors, change stitch patterns, or adjust sizing to suit your vision. Some of the most beautiful pieces emerge from creative experimentation.
Challenge yourself periodically by trying new techniques or unfamiliar project types. If you’ve been making blankets, try a garment. If you love amigurumi, experiment with lacy doilies. This variety keeps your skills sharp and prevents creative burnout.
Sustainable Practices in Your Crochet Journey
Mindful crafting considers environmental impact and creates items built to last. Crochet naturally aligns with sustainable values—handmade pieces are inherently more meaningful than mass-produced alternatives.
Choose quality over quantity when purchasing yarn. Natural, sustainably sourced fibers may cost more initially but create superior results and support ethical production. Consider recycled or upcycled yarns, which give new life to existing materials.
Use every bit of your yarn by keeping a scrap collection for small projects like granny squares, patchwork blankets, or amigurumi details. These scraps can combine into stunning rainbow creations that waste nothing.
Turning Your Passion into Beautiful Keepsakes
The true magic of crochet lies in creating pieces that carry meaning beyond their physical form. Each stitch represents time, care, and creativity—qualities that make handmade items treasured for generations.
As you develop your skills, you’ll find yourself creating gifts that recipients genuinely cherish. A baby blanket for a new arrival, a cozy scarf for a loved one, or a decorative piece that transforms a living space—these items become part of people’s lives and stories.
Document your crochet journey through photos and notes about each project. Years from now, you’ll appreciate seeing how your skills evolved and remembering the joy each creation brought. Your early, imperfect pieces are just as valuable as later masterworks—they show your dedication to learning and growing.
Beautiful crochet pieces aren’t defined solely by perfect stitches or complex patterns. They’re beautiful because they’re made with intention, care, and the unique touch that only handmade items possess. Every project you complete adds to your skills and confidence, preparing you for the next creative challenge.
So pick up your hook, choose yarn that makes you smile, and start creating. The world of crochet welcomes you with endless possibilities, supportive communities, and the profound satisfaction of making something beautiful with your own hands. Your crochet journey begins now—and the pieces you’ll create will be absolutely stunning! 🧶✨